Drilling a Well Using a Mud Pump
Many thanks to George in Fayeteville, NC for his stories and pictures!
A mud pump represents a huge improvement in drilling over just using two hoses. It improves water flow. A typical mud pump will put out 100 gallons per minute whereas two hoses are only good for about 12 to 15 gallons per minute.
It saves water. Just as important, a mud pump allows you to employ a re-circulating system so you can use bentonite or other gelling material that will solidify the sandy, crumbly walls of your borehole long enough you can drill without worrying about your hole collapsing on your drillpipe.
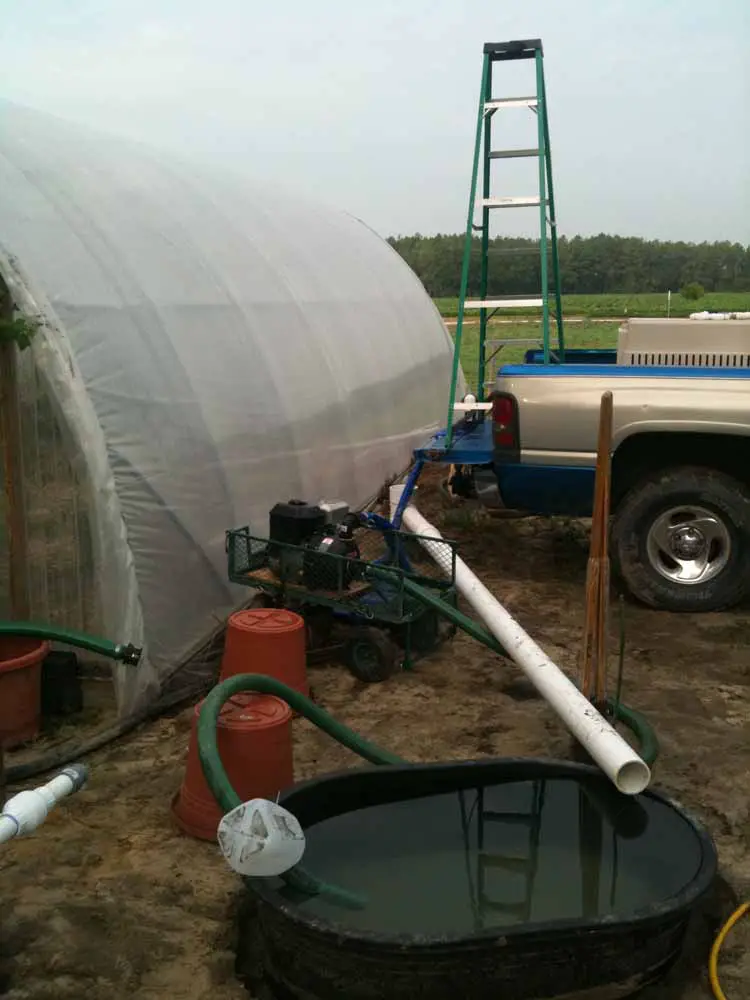
As you can see from the photo above, a portable mud pit is being used.
Additionally, a six inch PVC pipe has been inserted into the ground. A tee has been placed on the top of the six inch PVC pipe.
Water is pumped, using the mud pump, down the drillpipe. At the bottom of the borehole it turns and goes back up outside the drillpipe carrying cuttings with it. When it reaches the top it goes out through the tee over to the portable mud pit.
The portable mud pit is continiously shoveled to get the mud out of the water. A water/mud mixture is then pumped out of the pit and back down through the PVC drillpipe.
This is a much more powerful drilling operation than can be fashioned with two house water hoses supplying the drilling fluid.
Before we go further please take a look at the drawing below.It is from an excellent site, http://www.lifewater.ca/ that is dedicated to helping third world countries drill for water. The drawing shows their drilling rig, an LS-100 instead of our PVC apparatus but the mud pit arrangement is excellent. If you have time, it would be a good idea to go to https://www.lifewater.ca/drill_manual/Section_3.htm and browse around as well. They have many other excellent ideas.
The drilling fluid (water & bentonite) is pumped by the mud pump down the drilling pipe. At the bottom of the borehole it picks up cuttings and carries them to the top. At the top of the borehole the mixture of drilling fluid and cuttings go into a ditch that leads to a settling pit. The cuttings fall to the bottom in the settling pit while the drilling fluid goes over a small ditch into the the mud pit. During the drilling process, the cuttings are occasionally or continually shoveled from the bottom of the settling pit. From the mud pit, the mud pump pumps the fluid back into the drilling pipe and the process continues.
Note I am saying “drilling fluid” and not water. That is because bentonite or some other gelling agent is added to the water to make drilling fluid. As the hole is bored, this drilling fluid causes the sides of the borehole to harden. This is extremely helpful because the driller doesn’t have to worry (as much) about the borehole caving in on his drilling pipe. Any of you who have had a PVC drillpipe stick in a hole can appreciate how useful this trait is!!
Now let’s move on to George’s arrangement. Rather than dig up his yard to make the settling and mud pits, he is using a portable mud pit. He has inserted a six inch diameter piece of PVC into the ground where he will be drilling. Then he attached a tee with a four inch pipe coming off the side. This four inch pipe leads to his portable mud pit
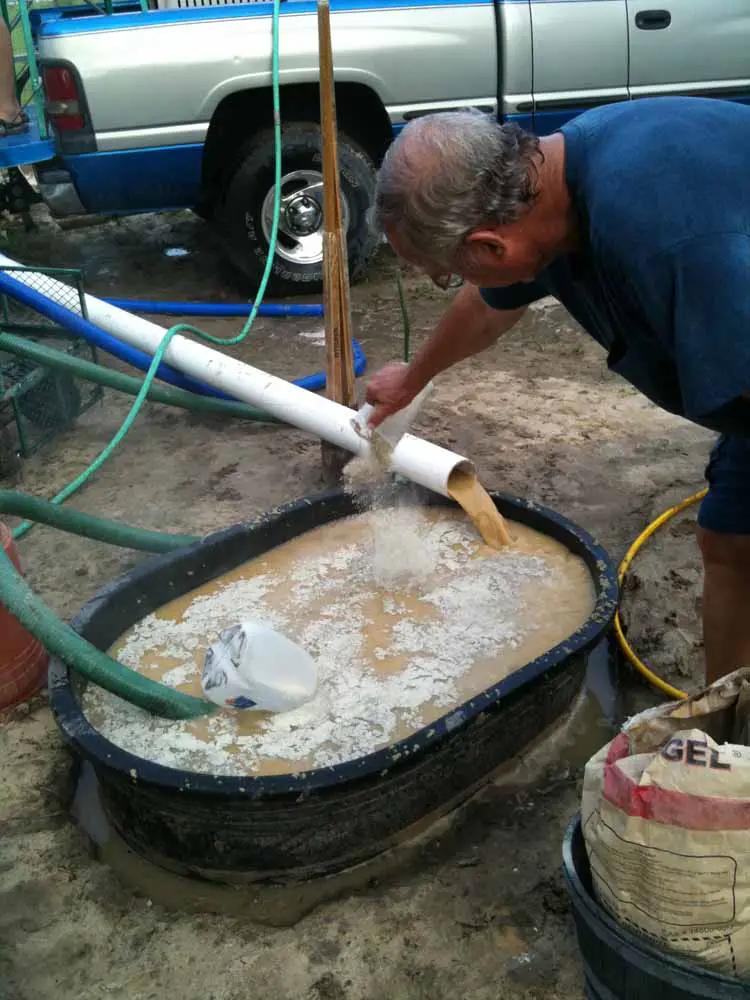
Quick Jel is added to the drilling fluid to
solidify the walls of the borehole
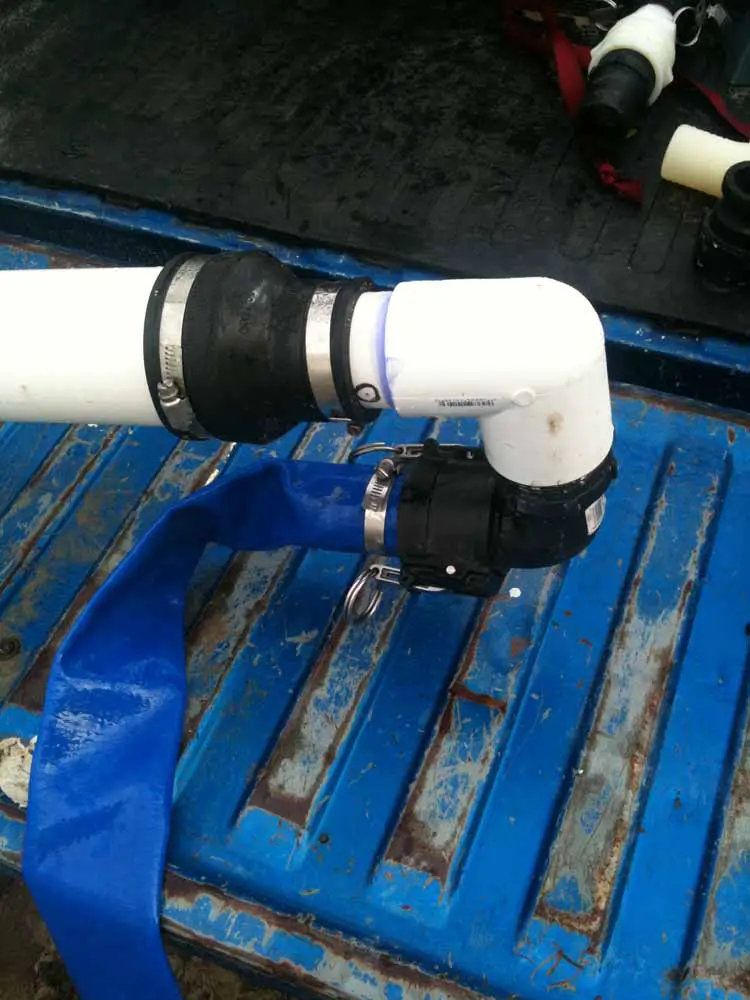
A two inch hose connects the mud pump to the drillhead
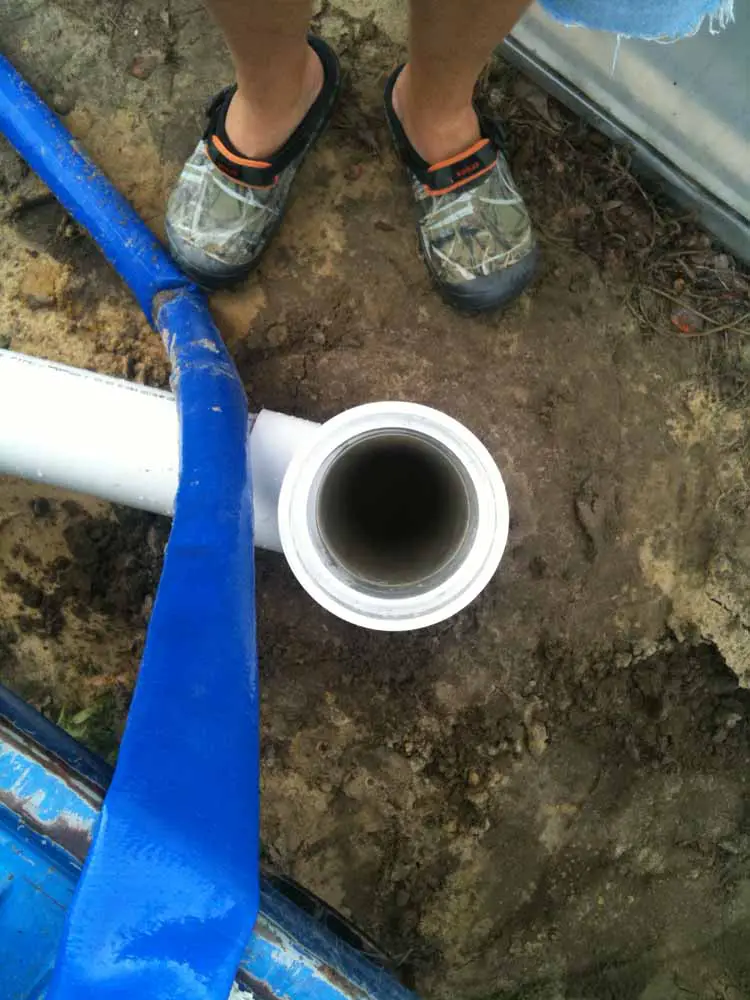
A six inch PVC Tee is placed over a piece of six inch PVC that is
inserted into the ground. This will direct the returning water through
horizontal piece of four inch PVC to the mud pit.
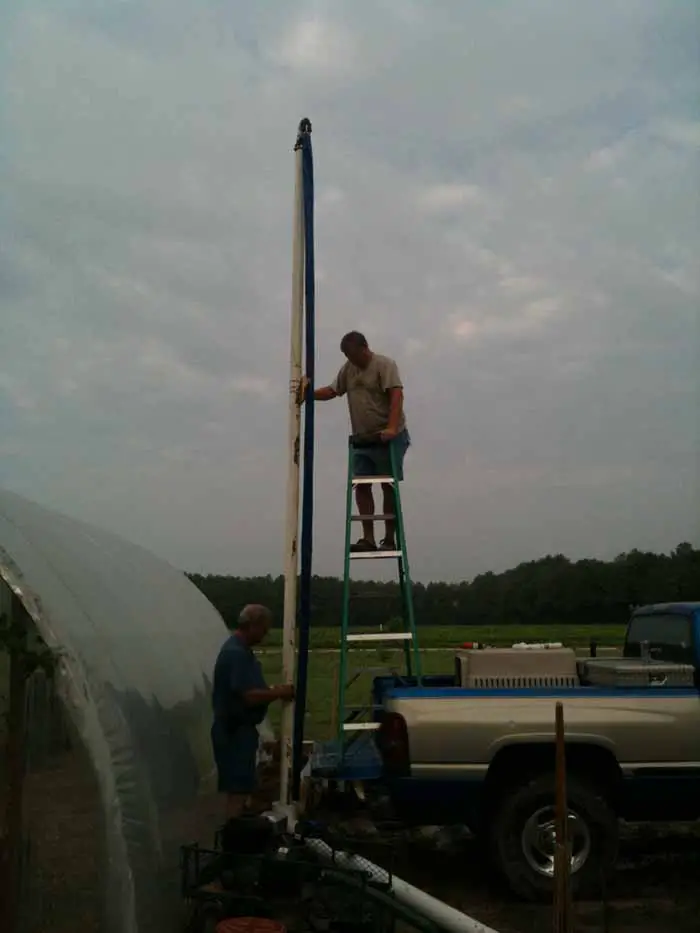
Standing up the Drillpipe – Preparing to drill
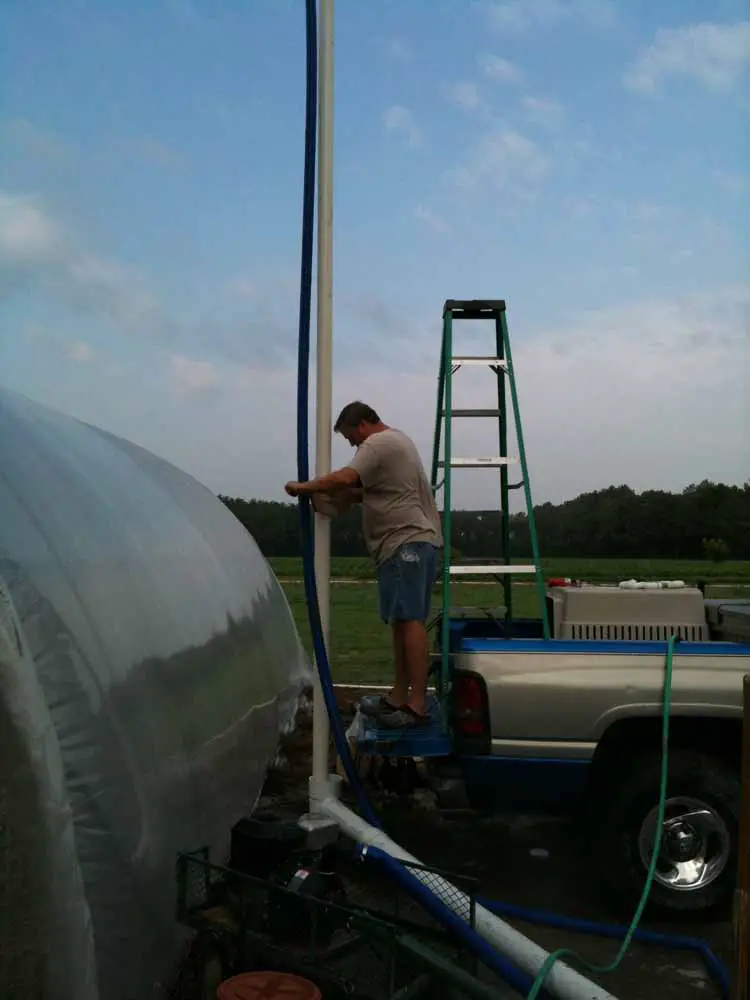
Drilling away!
Below are a series of eMails George sent as he was drilling the well. As you can see, it took a bit of experimentation to find the right combination of size, speed, and drilling mud. He kept at it and his ultimate success is most impressive. I left off a couple of the first emails. As the story begins, George has a two inch pipe stuck in the ground from an effort using two water hoses as drilling fluid.
Hello Mike,
Using the mud pump method was GREAT ! I set everything up and had my neighbor over to help. I put the 20’ piece of 3″ pvc over my stuck 2″ pipe …. fired up the mud pump and got the water recirculating into my 110 gallon livestock tub. In less than 30 minutes, I had washed down to where the 3″ pipe was on top of the 2″ pipe. The 3″ pipe started wanting to stick in the soft sand, so I had my helper to add about 15 lbs. of “Aqua Gel” that I picked up at the plumbing store where I buy my well screens from. It’s a combination of bentonite and a vegetable polymer. Within a few minutes, I was able to easily slide the 3″ pipe up and down/side to side to enlarge my bore hole …… it quit caving in and sticking like it had been doingJ Instead of having to take the 2″ pipe out, both pipes washed down together ! At about 19’, I hit hardpan … so I decided to stop and pull out the 3″ pipe. After doing this, I had so much room left in the borehole, that I was able to pour 2 bags of pea gravel down the outside of my 2″ pipe all the way to the bottom …. without any caving in issues. I think I could have easily put down a 4″ pipe and well screen down that hole. The Aqua Gel was doing its job nicely.
Total time using the mud pump from starting to when I finished putting in the gravel pack was only 1 hour ! The guy at the plumbing shop told me I would have to backwash the well to remove the Aqua Gel because it would stop up the aquifer. I did that using my 110 gallon sprayer tank that was standing by full of clean water. I then hooked up my mud pump to the well and pumped it for 10 minutes … only getting about 9 gallons/minute flow. During this time, I filled my 110 gallon sprayer tank back up with clean water. I back flushed the well again …. after this time, I got a 16 gal/min flow …. getting better J On the third time I back flushed the well, I surged the mud pump from slow to fast … back and forth as it back flushed. Hooked everything back up and started pumping from the well ….. now getting 30 gal/min !! I decided to quit while I was ahead …. plus the temperature was pushing 100 degrees !!
Next weekend, I’m moving over about 14’ and putting down a second well so that I can eventually combine the two for my irrigation. I’ll take pictures and email them to you. I used a 6″ tee that had a 4″ side port to recirculate back to my 110 gallon stock tub. I only put 3’ of 6″ pvc in the ground and packed around the pipe to prevent leakage. Everything worked great … just like in the PVC video you sent me where the guy was using two dug pits to recirculate from.
I know this email is lengthy, but I just wanted to say THANKS for all your effort and help !
next eMail)We jetted down the second well this past Saturday morning. It took only one hour from the time we started the pump until I finished with the gravel pack !! I used a 3″ pipe to jet with …. dropped in my 2″ pipe with 5’ well screen …. then pulled out the 3″ casing. At this point, there is enough room to pour 2.5 bags of pea gravel down the hole beside the well pipe. By using the Quick Gel, the hole does not cave in on the well pipe. The big difference this time was that I immediately back flushed the well with 110 gallons of fresh water to clear out the Quick Gel …. instead of trying to pump from it at the beginning like I did with my first well. This second well pumps a huge 60 gpm !!! I was amazed … to say the least. Tied together, both wells produce 90+ gpm with the pump slightly above idle speed J I’ve included some photos in this email and will send you some short videos in a follow up email. I hope it does not clog up your Inbox.Thanks so much for your help …… and inspiration from your website which got me started on this project !
(next eMail)
Here are the short video clips. One thing I forgot to mention earlier was that you really have to mound up and pack the dirt around the bottom of your 6″ tee. We had a couple of times when the circulating water tried to come up around the 2.5 foot piece of 6″ pipe we had in the ground below the tee. It would be better if you could drive that pipe in the ground maybe another foot, but I did not have anything to do that with. Using the Quick Gel gives you enough time to stop and fix your leaks as you go without risking a cave in on your pipe.
Thanks,
George

Here, George is setup to use the mud pump to test pump the well
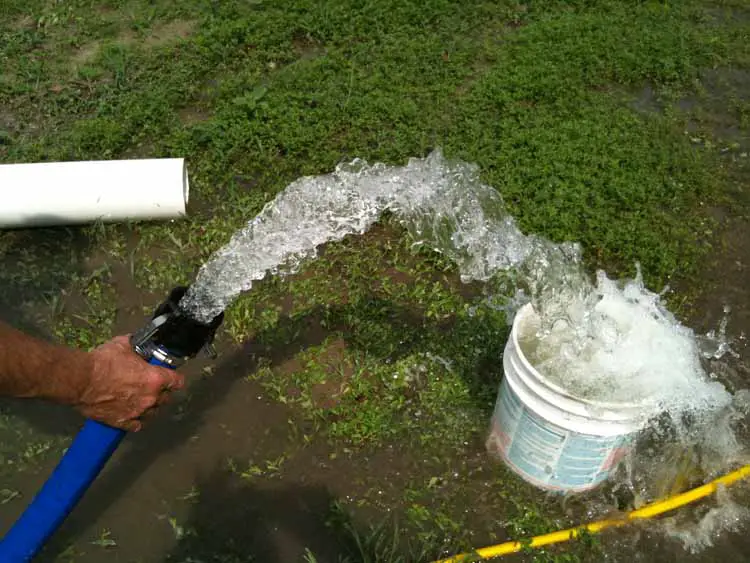
Looks like it worked – 60 GPM!!