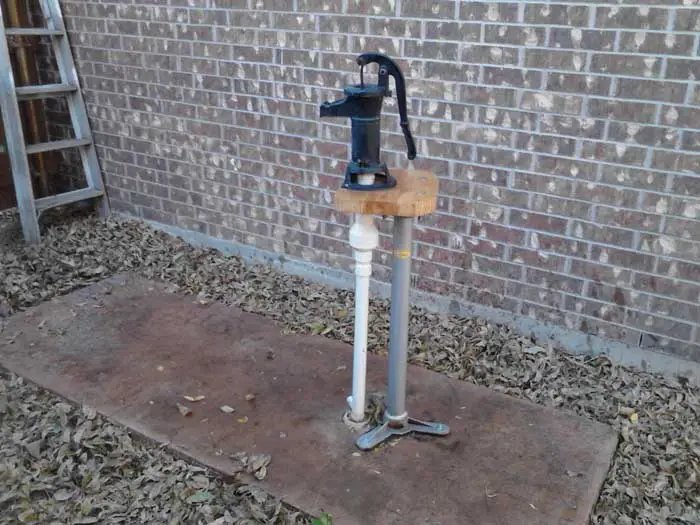
Congratulations to Alex in Texas successful well!! Alex drilled 33 feet and reports his well produces “as much as he can pump.” As you can see, he has a hand pump installed.
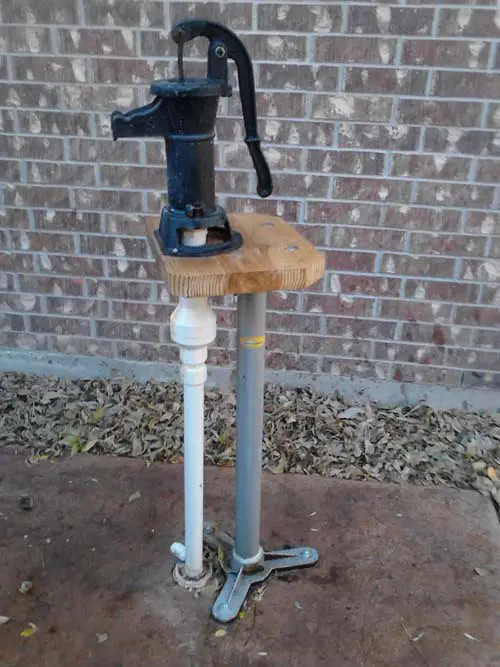
Alex used a high speed nozzle to wash down a small pilot hole using a technique he devised. Then he enlarged it with progressively larger pipes attached to a two hose top fitting as shown on this site. He provided a very detailed report on his drilling project:
Mike,
Your comment about the feasibility of jetting a four-inch well got me thinking. Well diameter and water volume needed for jetting are exponentially related. If I reduced the diameter from 2 inches to 1 inch, I would be getting four times the flush rate. So, I figured I would create a small diameter well jet rig and then follow behind it with a 2 inch rig. I also wanted to develop a bit with boring ability at the center and the edges.
Here are the steps with some pics of making the bit for the small diameter rig. Though I used 3/4 inch pipe and fittings, the outer diameter of the rig is 1.25″ at the wide spots.
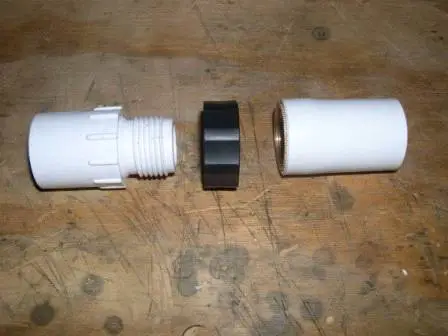
1. The materials cost me just under $11 at Home Depot.
a. Sweeper nozzle.
b. Hose to pipe adapter. Male.
c. Hose to pipe adapter. Female.
c. Three pipe couplers for 3/4 inch PVC
d. Three ten-foot sections of 3/4 inch PVC pipe. (Not pictured but included in the $11).
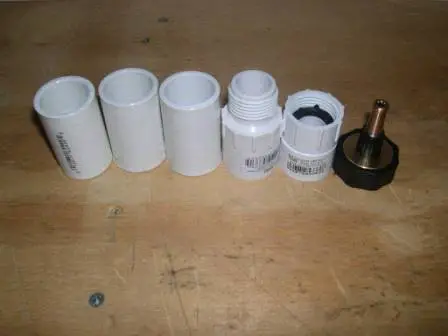
The Hose to Pipe adapters can be hard to find at a Home Depot. I looked for 30 minutes and asked two people before finding a third person who knew exactly where they were located. My store had them in the sprinkler head section.
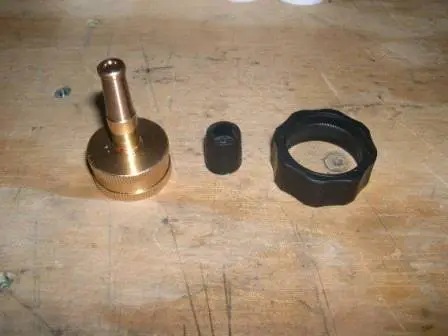
2. Remove the rubber “comfort” rings from the sweeper nozzle. Save the large ring, you will need it later.
3. Bore out one side of a coupler to 1 and 1/8 inches. I did a wobble with my 1 inch Speed Bore bit and then finished off with a 1 and 1/8 forstner bit. You only need to bore enough to accomodate the base of the sweeper nozzle. Forgot to photo.
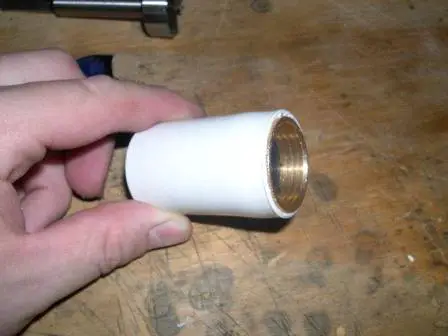
4. Feed the naked sweeper nozzle into the bored coupler. Force the sweeper bit into the coupler using your bench vice as an arbor press. Forgot to photo. Your sweeper nozzle is now permanently set into the coupler. It will NOT come out of the coupler. You can see in the photo that the coupler is actually bulging a bit. You can also see that the tip of the nozzle is only about 1/4 inch shy of the end of the coupler.
5. Thread the bit onto the Male specialty hose to pipe adapter. I used the comfort ring from the nozzle to fill in the space around the unused threads. I coated the threads with Gorilla Glue to help seal the bit to the adapter.
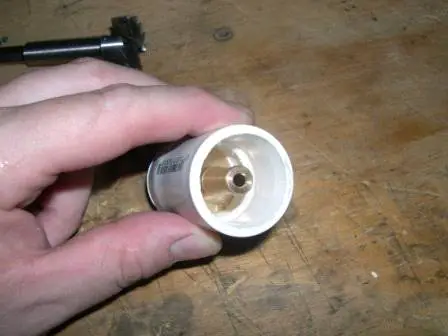
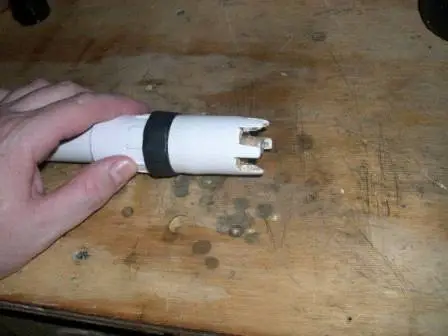
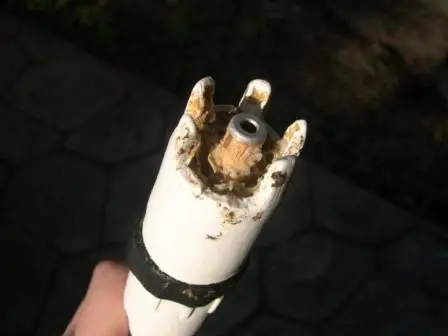
6. Cut diamond blade-style teeth into the other end of the coupler. I made 12 cuts at 1/2 inch deep. I made heat cuts by getting a painter’s tool red hot in a propane torch and then pushing down. Then, I removed every other tooth. I used the heat cut method for removing the teeth. The heat cuts create ugly, nasty, mean burrs which really help to cut into the soil. The large teeth also allows better water flow. This is needed because that sweeper nozzle is going to be dislodging material quickly. I forgot to photo the teeth cutting, but here’s a picture of the teeth after I finished jetting the well with the bit.
8. Fill the bit with JB Welds or PC 7 A/B. Add your goo of choice until it is 1/4 inch below the bottom of the teeth. Let this harden. This will keep your nozzle from getting bent/broken. Forgot to photo. The bit assembly is now ready to be glued to your 3/4 inch PVC pipe.
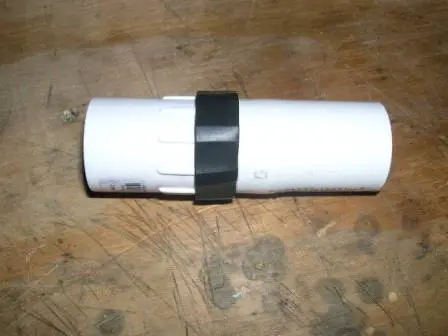
9. Attach the Female hose to pipe adapter onto your PVC pipe using two small diameter set screws. Push the adapter all the way on. Then, drill two holes with a 5/64 inch bit. Then, screw in the set screws. Forgot to photo.
On the first section of pipe, the fit of the female adapter was good. No leaks. After I added the second section of pipe, it was leaking and getting me plenty wet, but it still worked. Since the third section was the final section of pipe, I was able to just glue the female adapter on at that point.
Using the bit.
I used my 1 inch Speed Bore bit to create a starter hole in the ground.
I used a butter churn, ram, twist technique for this bit. Because there are threads in the bit assembly, any twisting motion should be clockwise.
Step 1: Lift the pipe about 1 foot.
Step 2: Ram the pipe back down.
Step 3: While pressing down on the pipe, rotate clockwise 1/4 turn.
Step 4: Lift the pipe back up about one foot. Pipe should feel free and easily rotate. Rotate the pipe counter-clockwise back to your starting position.
Step 5: Repeat steps 2-4.
Step 6: After about 20 butter churns, flush the hole with a few 3 foot butter churns.
The hose had a tendency to pinch at the top cause it was straight up. I made a small loop and held the hose to the pipe with my hands.
Once I reached 25 feet, I needed to fully flush the well. I then realized that I needed more water volume than I could fit through that sweeper nozzle. The sweeper nozzle hits full strength at only 1/4 turn of my faucet’s gate valve. Unbelievably, I was able to jet all 25 feet with only 1/4 turn of my faucet valve. For final flushing, I pulled up the 30 foot section of pipe and cut off the bit and six inches of pipe. I put it back down and flushed with a wide open faucet.
As you can see, the top of the well is almost 4 inches in diameter. I think this is due to the flexibilty of the 3/4 pipe causing it to bow and bang against the sides as I was jetting the well.
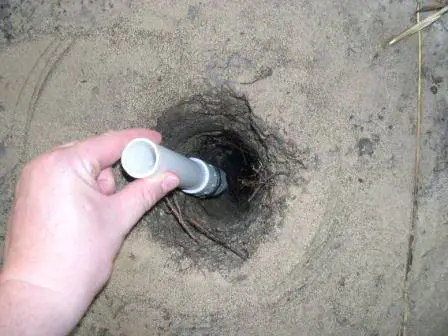
You can also see that my bit was showing some signs of wear. Luckily, it only lost one tooth. All the heat cut burrs were worn away smooth, but there is still plenty of digging power thanks to those 1/2 inch teeth.
————————————————————————————–
I asked Alex how he was able to make a big enough hole to put a well screen in. He replied:
Mike,
No worries. Here’s the run down that should answer your question.1. I used the single hose, center bore only to do my exploratory jetting through the Texas clay. I felt this was a cheap and easy way to determine my soil profile and static water level.2. I then bored out the exploratory hole using your two-hose method and increasingly larger sized pipes. First, I bored it with 1 1/4 inch pipe. Then, I bored it with 2 inch pipe. Finally, I bored it with 3 inch pipe. Since the Texas clay wasn’t collapsing in on me, I was able to take this approach. Also, incrementing the bore pipes wasn’t too expensive because the jetting assembly could be adapted to accept the different size pipes simply by changing out the rubber adapter thingy.3. After it was all bored, out the diameter at the bottom of the well was 3.5 inches. I re-used my 1 1/4 inch bore assembly fitted with a 30″, 80 mesh, Simmons well point as my supply line.
Alex
NICE JOB, ALEX!