I had wanted a geothermal heat pump for a long time. I wanted the savings on my electrical bill that could be realized from geothermal. I sure didn’t want to pay a driller to put in injection wells, so I did it myself, using the techniques described on these pages.
BEFORE
AFTER
Using three injection wells drilled using this technique, I installed an open loop geothermal heat pump system for a for about $1,000 plus the cost of the heat pump. I already had a supply well that I used to water the yard. I drilled three injection wells and installed PVC to run the water from the supply well to the heat pump, and then on to the injection wells.
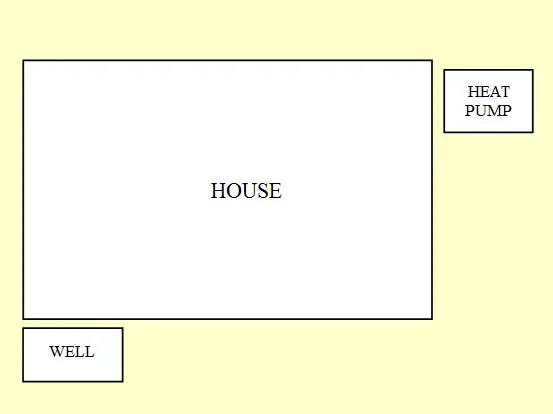
In October of 2009 the primary heat heat pump we use to heat and cool our house died. It had to be replaced. We had been studying geothermal heat pumps for years and wantedto realize the savings on our electrical bill that geothermal would provide. We had already decided on geothermal but if we needed any prodding, the $652 electrical bill (heat strips only) we got for November certainly helped to solidify our decision. We already had an excellent well. It would produce plenty of water to run a geothermal heat pump but we needed injection wells to return the water to the ground after it passed through the heat pump. Here is a crude drawing of the layout of our house.
I needed to install pipe to get water from the well to the new geothermal heat pump. Then I needed to pipe that same water to an injection well. I had heard of some injection wells getting plugged up and losing some efficiency as they aged. To avoid that I drilled three injection wells using the techniques described in this site. Two of the injection wells had sufficient capacity to accept the full 12 GPM the heat pump used. One had 5 GPM capacity. I’m hoping that by putting in three injections wells, I have a bit of insurance against any reduction in performance. Too much capacity would be a lot better in the long run than too little. Here is a schematic of the piping that was needed: |

Obviously anyone who says a picture is worth a thousand words hasn’t seen one of my drawings. Hopefully you get the picture. It was necessary to trench the yard to put the PVC pipe in. Here are some photographs
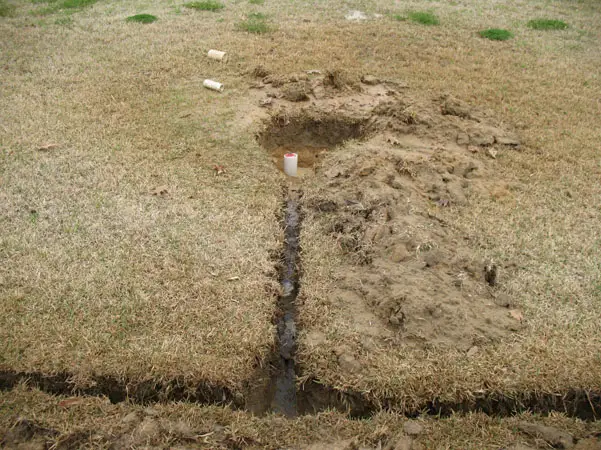
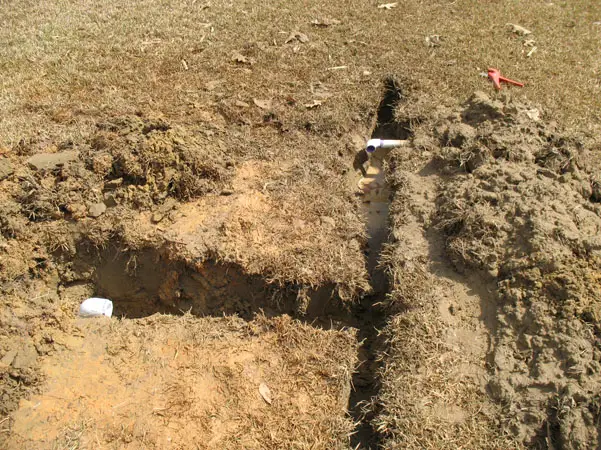
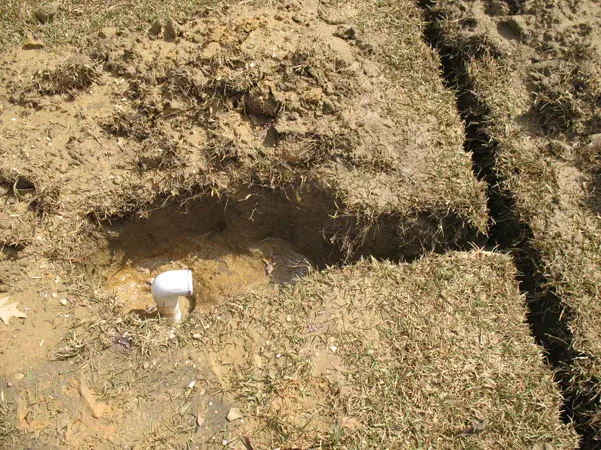
You may notice in the photograph below that I have not filled in the annular space with cement. This was dumb and because I failed to do it I had to go back and do it later. On an injection well for a geothermal heat pump system always fill in around the annular space with cement. This will keep the water that is being injected back into the ground from coming up around the well pipe.
I finished all the trenching one night about 7:30 pm. That night, right on schedule, it rained. I was at the point where I was ready to put the PVC pipe in but my trenches were full of water. My yard has a little tiny bit of topsoil perched on top of ten feet of clay. It perks almost as slow as a clay bowl. The next morning I was ready to proceed with the installation of the PVC. I needed to get that water out of the trenches so I could install the pipe, so…
OK, so I made a slight mess. Hey, I got the water out of there, didn’t I?
Next I cut and glued up all the PVC pipe. For the supply line that ran from the well to the heat pump, one inch PVC was used. To go from the heat pump to the three injection wells, 1 1/4 inch pipe was utilized. A couple of minor bumps were encountered. A sprinkler head and a sprinkler line turned out to be in the planned path of the PVC. Other than that, it went smoothly. Not particularly fast, but smoothly. After a couple of days of cutting and gluing with numerous extra trips to Lowes for PVC fittings, it was done.
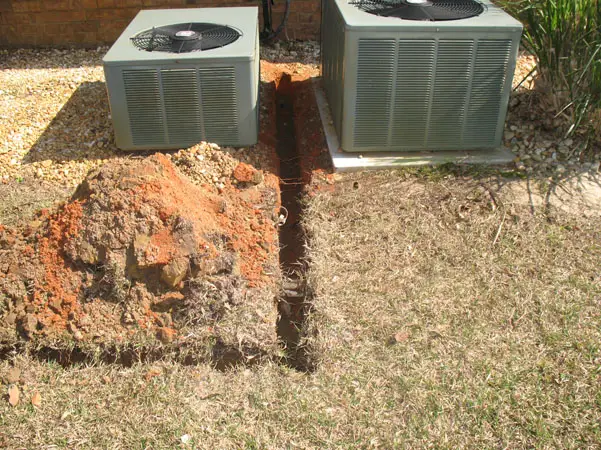
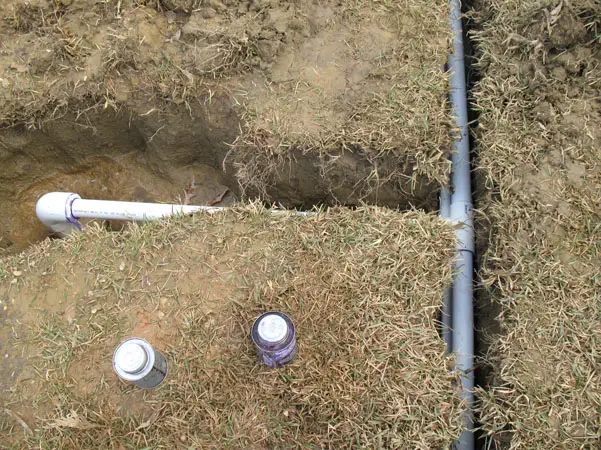
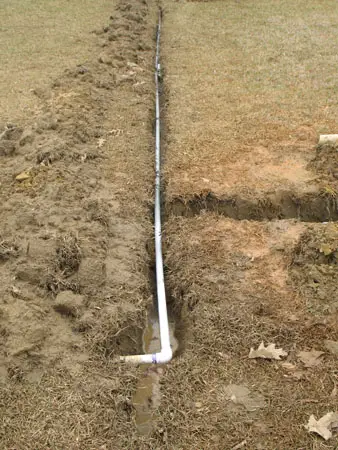
Here are some pictures. The first two show the detail of the 1 1/4 inch pipes going to the injection wells. You can see two pipes in the main trench. The pipe on the bottom is the one inch supply line. The pipe on the top is the 1 1/4 inch drain returning from the heat pump.

Above is a better view of where I didn’t fill in the annular space with cement. Dumb, dumb, dumb.
In the next two pictures you can see the branches going to all three injection wells. You can see the supply well on the right. A few years ago, in anticipation of geothermal, I had put in a one inch supply line from the well to the area where the injection wells were drilled. That was one small part of the yard I didn’t have to dig up.


In the photo above, the old heat pumps are on the left in the distance. A sprinkler line was in the originally planned path of these lines.
After I finished the piping I needed to fill in the trenches. I didn’t particularly want to put clay back in so I bought some topsoil. I got Scotts Premium Topsoil. After using it in this project and a subsequent one, I wanted to look into it a little more. I was surprised by the contents of this product. It is horrible. I have summarized my findings in the video below.
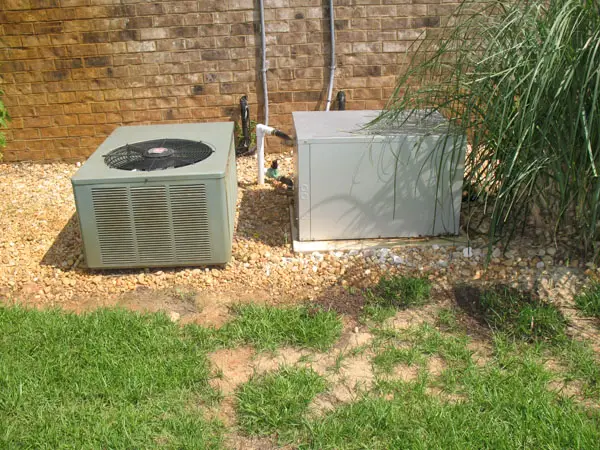
Next, I had a Florida Heat Pump unit installed. It worked great!
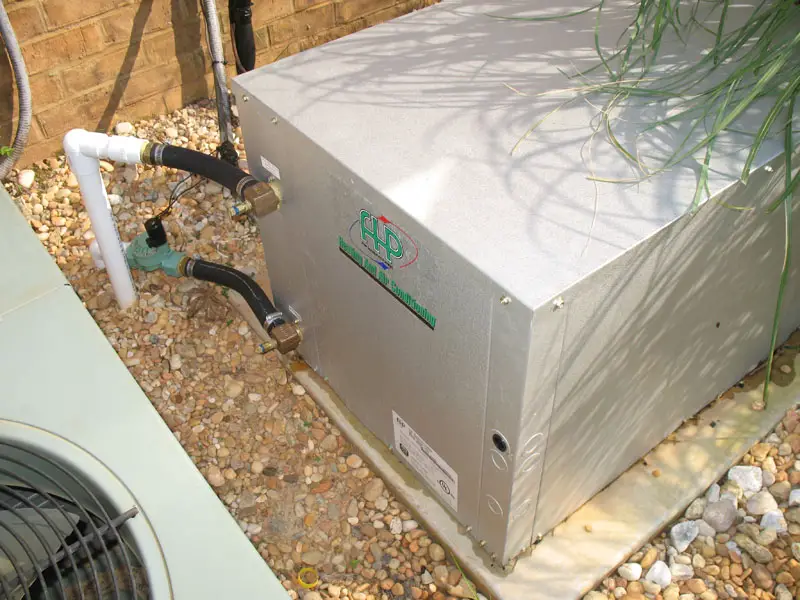
OUTSIDE UNIT

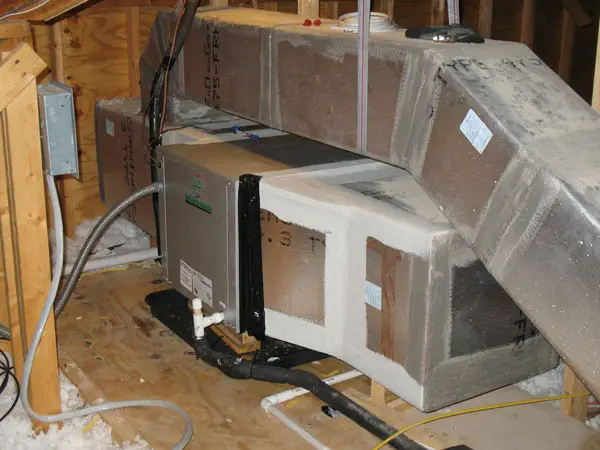
INSIDE UNIT
I thought that would be the end of the project. Just one problem – My well pump was cycling on and off way too much.
The Geothermal heat pump worked like a champ. It cooled well. It heated well. The supply well had more than sufficient output to sink all the heat the heat pump needed. The injection wells were working perfectly. We adjusted the water flow so that the difference between the temperature of the water entering the heat pump and the water leaving the heat pump was the recommended 10 degrees.
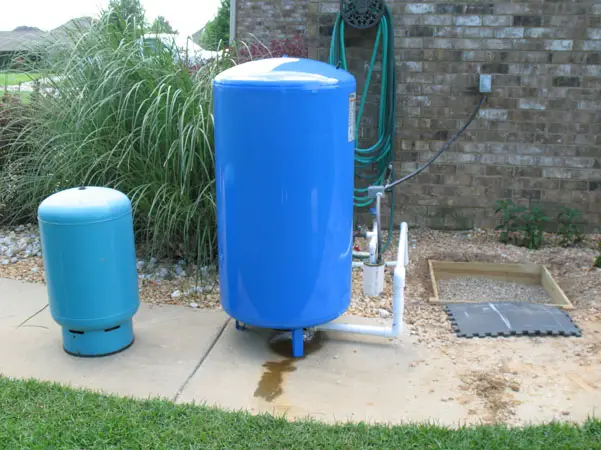

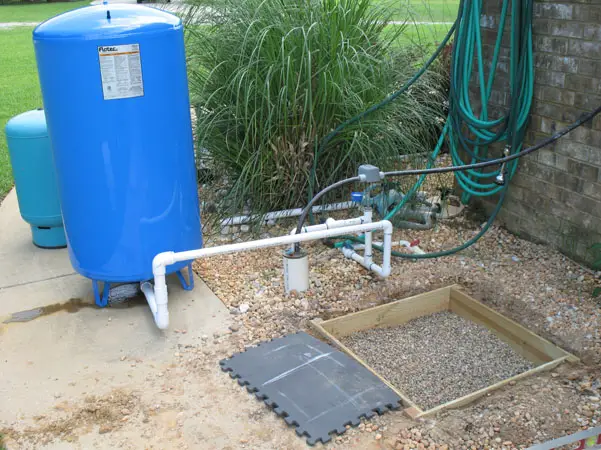
A bigger tank was needed to relieve the cycling. The function of a water tank as part of a well system it is to store water and pressure. The tank contains kind of a balloon that is under pressure. As water is pumped into the tank pressure in the balloon is built up until the well turns off. As water is released from the spigot, the water pressure goes down in the tank and when it reaches a pre-set point, the well turns back on and pumps it back up. My well pump was cycling on and off way too much. A bigger tank was needed to reduce the cycling. I purchased a much bigger tank from Northern Tool. It was so big it would not fit on the existing piece of concrete. Here is a photograph of both the old tank and the new tank for comparison.
In the picture above, the new tank is temporarily connected while setting on a nearby sidewalk. This, of course necessitated yet another project. A slab was needed for the new tank to set on. I had never poured a slab but I decided to give it a try. I made a form from wood, leveled it, and put a couple bags of pea gravel in the bottom.
Below is a video of the process of pouring a slab.
The slab was poured and the new tank was connected. The forms were removed. Then the tank was painted to blend with the house. See what you think!
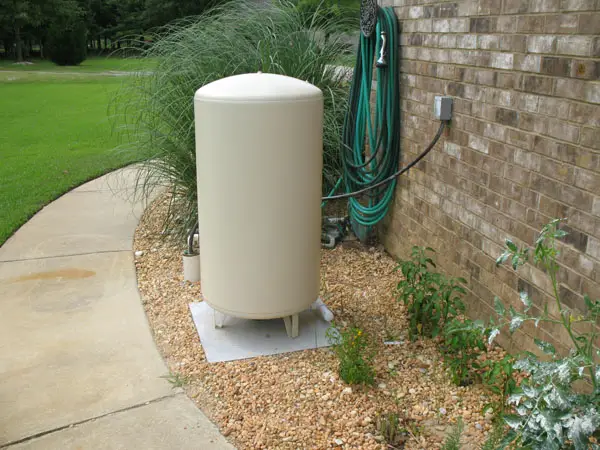
FINISHED !
This solved the cycling problem. It previously was cycling on and off every 15 seconds. Now it is about every 90 seconds. It is working “well!”
MAJOR PROBLEM: The injection wells worked great for about a month and then they plugged up. I think the fines from the well water plugged up the bottom of the injection well. I decided to go to a loop system with HDPE pipe making a loop though wells that I drilled. So, next I drilled four wells
I drilled four wells, each 30 to 50 feet deep and ran a loop of HDPE pipe through them. That was not near enough. I had a commercial driller come out and add three 250 foot loop wells to the system and it worked perfectly after that.
UPDATE 2020: Its been ten years and the Geothermal unit is still working perfectly. Cooling is good and heating is great. If I had to do it over again, I would not do it. When it comes to getting your A/C serviced, it is very useful to have a cooling system just like everyone else’s. Although the geothermal does same some on the electrical bill, it set me back about $15k and overall I have saved some money, but not a lot. When the A/C service companies come out, some scratch their head and leave. Others know just what to do. I just think it is useful to have a regular system that is easy to find repair folks for.