The standard method suggested by this site for DIY well drilling
Before we go further, it is important to understand the standard method of drilling or washing a well (sometimes called a borewell) that I am suggesting you use. There are several variations or “enhancements” to the technique but first please just understand and try this plain ol’ well washing method.
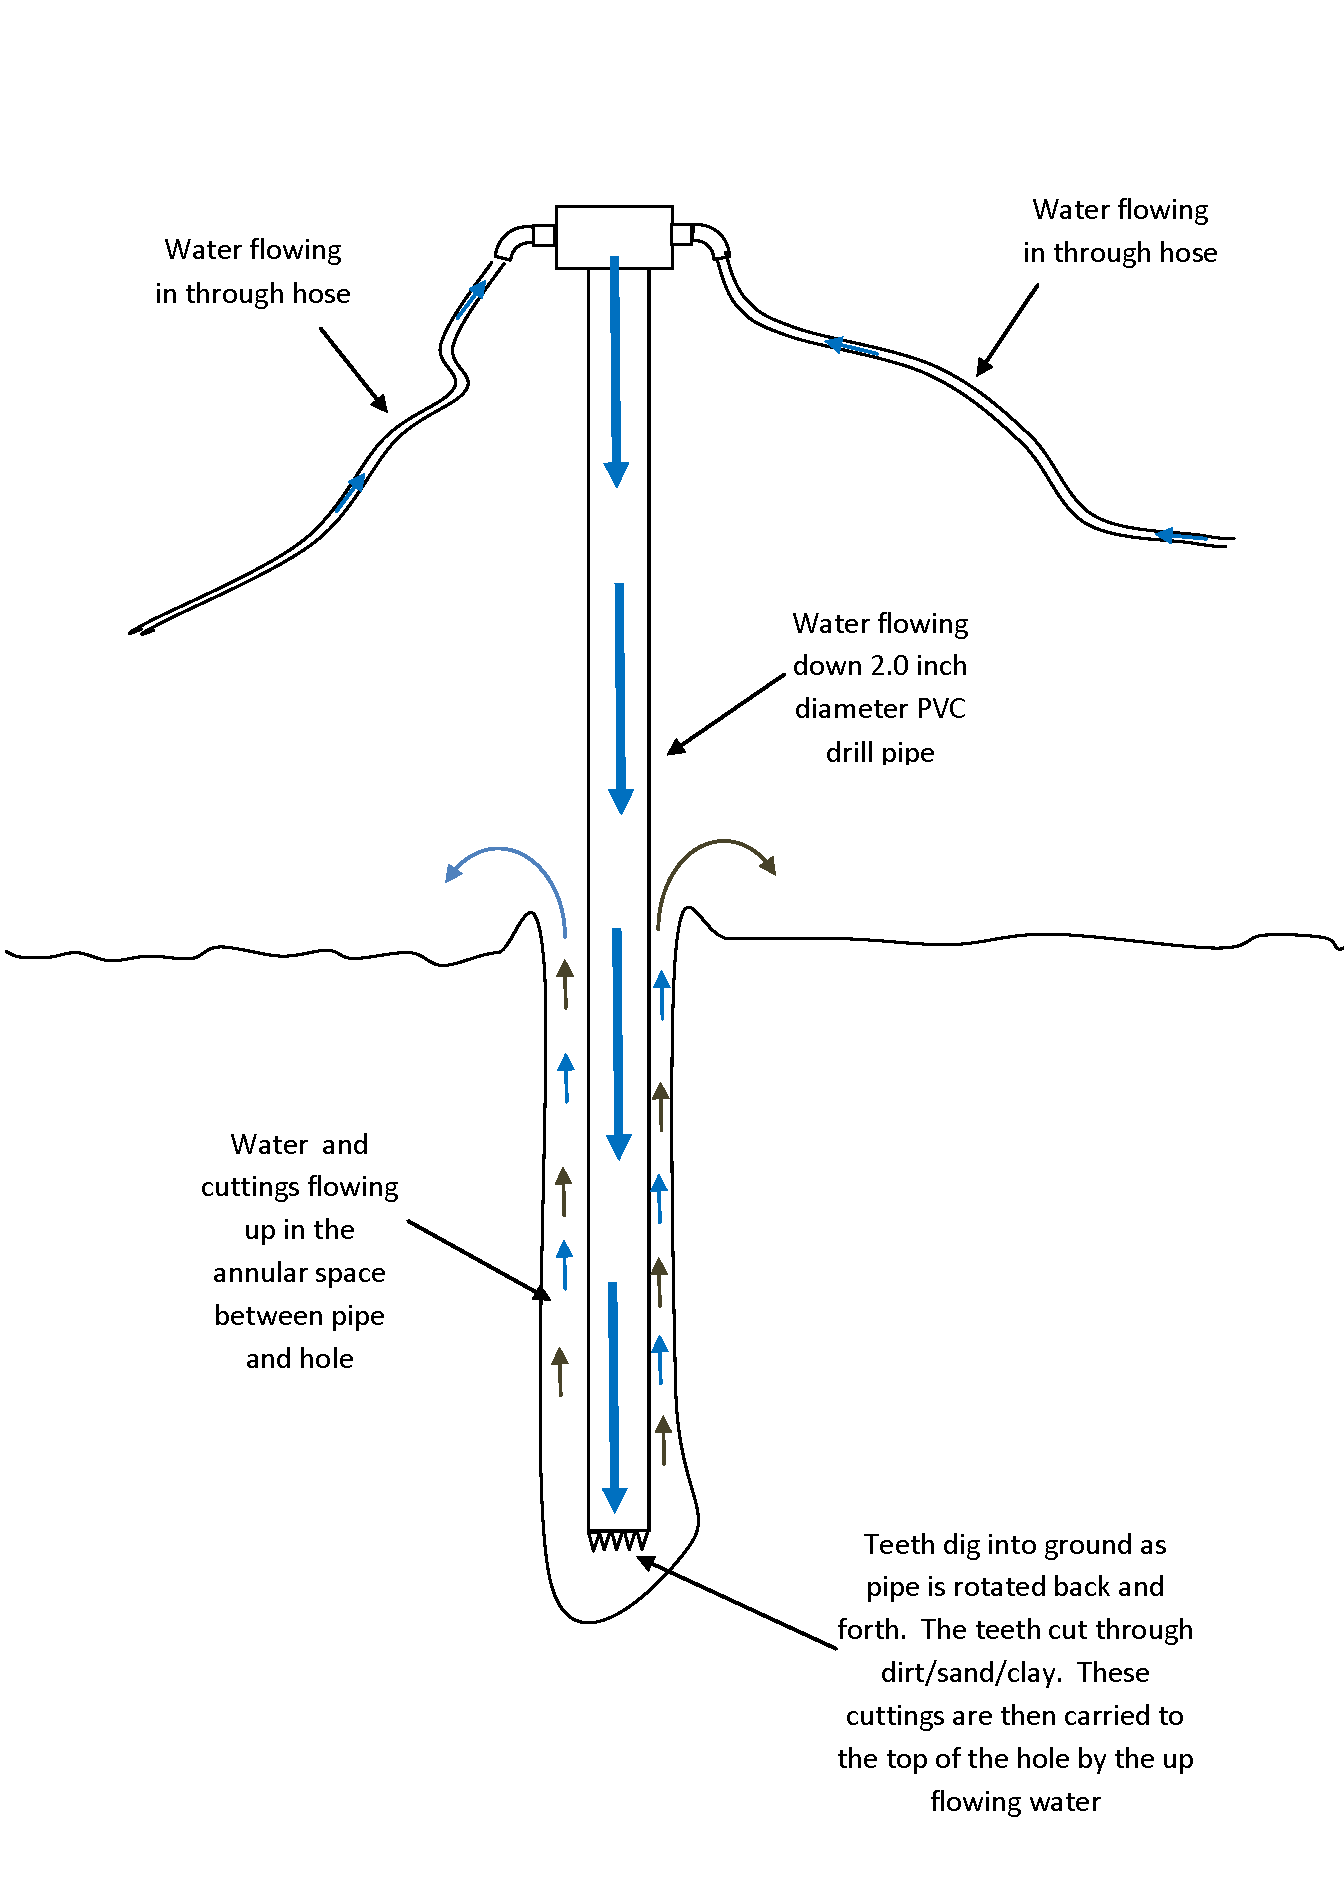
The first step is to drill the bore hole. Do this by running water down a 2 inch piece of PVC as you slowly rotate the PVC back and forth, working it down into the ground. The 2 inch PVC is the drill pipe. It has teeth cut into the bottom end of it. The bottom end is drill bit. Teeth cut into the end of the PVC will dig away at the dirt or clay or sand and then the water will carry the cuttings to the top. Make sure you understand the drawing below before you go any futher.

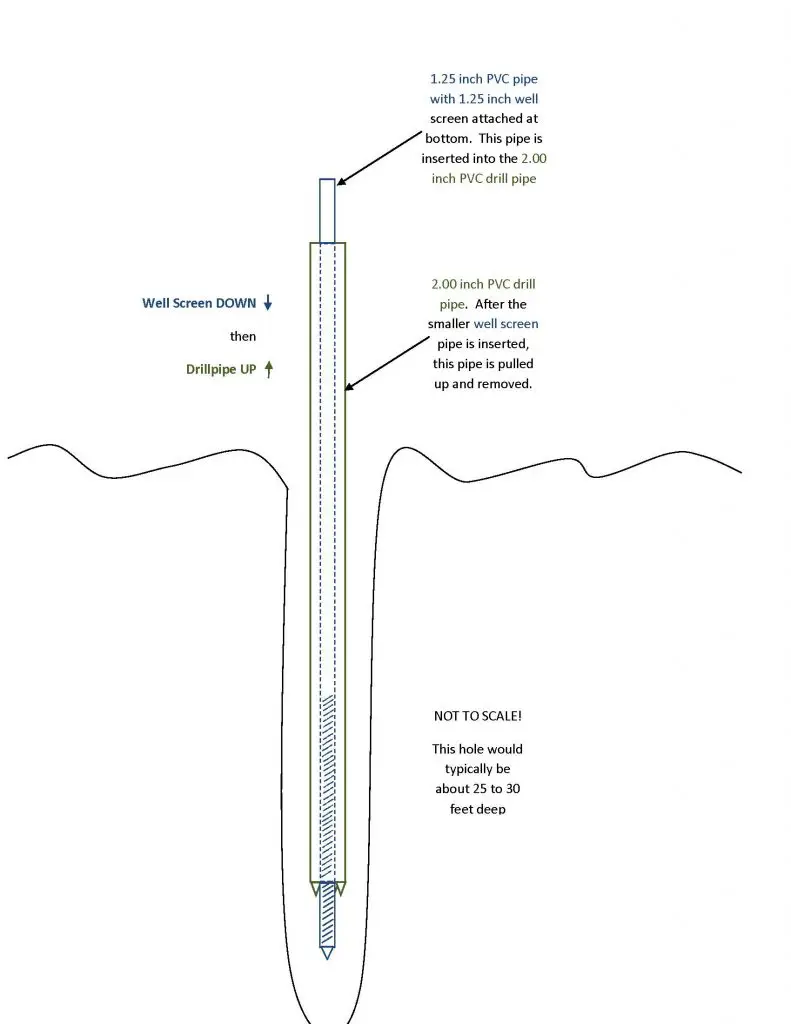
After you have drilled the hole you need to put the well screen in. You can’t just pull the drill pipe out and then insert the well screen pipe because most of the time sand will collapse in the bottom of the hole. Unless you are extremely fast, you won’t be able to get the whole length of well screen pipe in. By using a larger drill pipe than your well screen pipe you can put the well screen pipe in before you take the drill pipe out. So, the next step is to set the well screen…
BEFORE WE GO FURTHER YOU MUST UNDERSTAND WHAT A WELL SCREEN IS: A well screen is a piece of pipe with a bunch of slits in it sized so water can enter and sand can not. The slits are skinnier than a piece of sand. By a bunch of slits, I mean hundreds. In this instance we will be using a well screen made from PVC. Most are three or four feet long. You simply glue them to a length of PVC and put the slotted end at the bottom. Say your hole is 29 feet deep and your well screen is 1.25 inches in diameter and 4 feet long. Your well screen pipe would consist of four feet of the slotted pipe at the bottom attached to 25 feet of 1.25 inch diameter PVC pipe.

Keep the water running while you do the next steps. This will keep your drillpipe loose in the hole. While the circulating water is keeping the pipe loose:
- Make up your well screen pipe by gluing a 1.25 inch well screen to a 1.25 inch PVC pipe. The total length should equal the depth of your hole.
- Turn off the water and disconnect the water supply from the top of the drillpipe.
- Put the 1.25 inch well screen pipe into the 2.00 inch drill pipe and insert it all the way to the bottom of the hole.
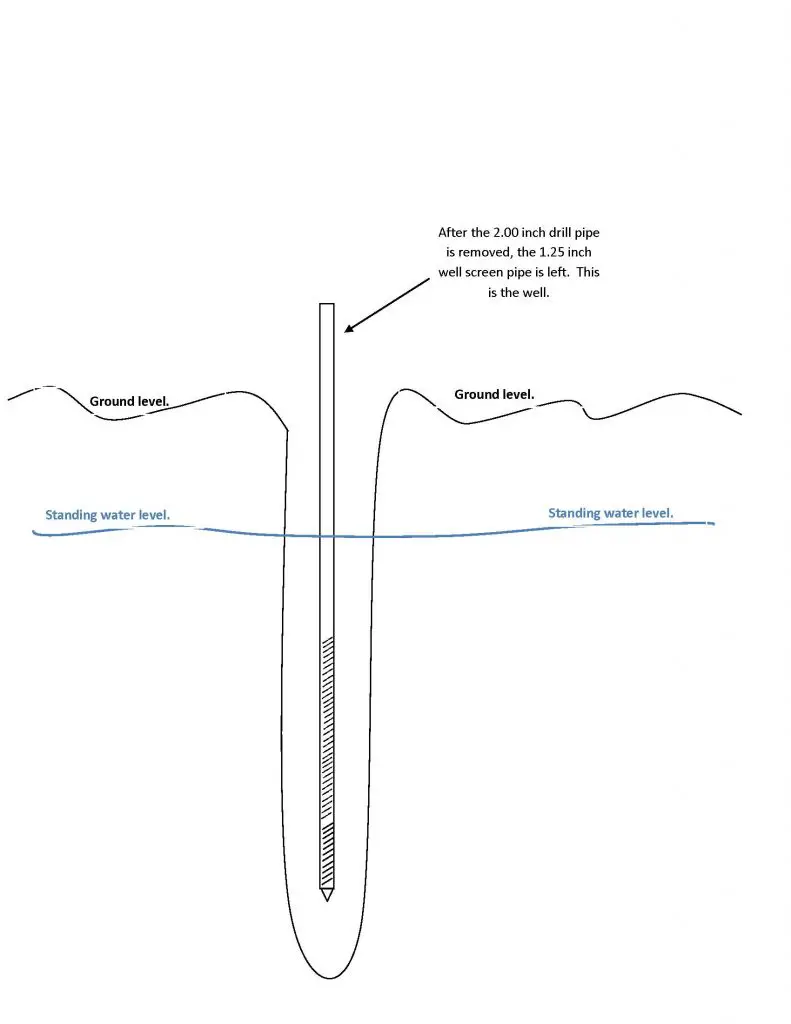
- Pull the 2.00 inch drill pipe up and out of the ground, taking care not to pull the 1.25 inch well screen pipe up with it.

This will leave you with just the 1.25 inch well screen pipe in the ground. This is your well. You have a bit more work to do but you could attach a check valve and a pump to it at this point and have an operational well.

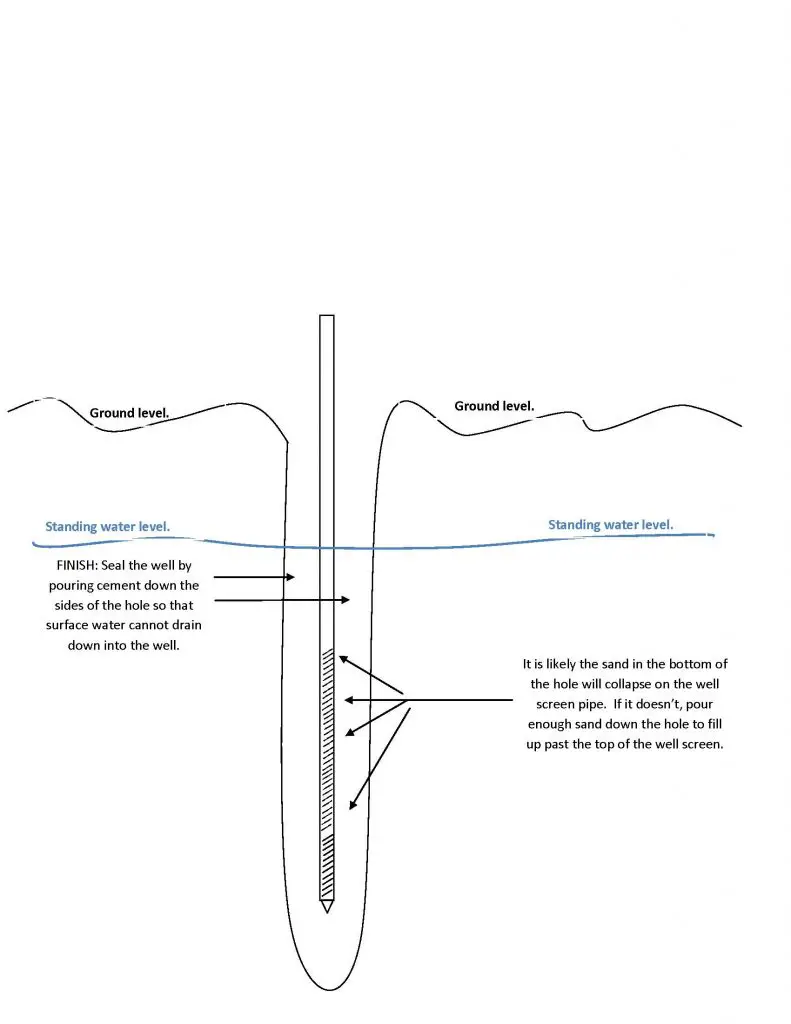
Next, test pump the well. After you are happy with the performance of the well and you are sure you won’t be pulling the pipe and re-drilling, you need to seal the top of the well. This keeps surface contaminants from getting into the groundwater. Do this by putting cement or bentonite down the sides of the well in “annular space” around the drillpipe. Before you do this make sure the sand at the bottom of your well has collapsed around your well screen. If it hasn’t or if you are not sure, pour some sand in until you get within 10 feet of the top and then fill it with cement. Most folks are referring to concrete when they say cement. Finish the well by pouring wet cement or bentonite down the annular space so the top 10 feet are filled.
Side note: When I say cement, I mean cement, not concrete. Concrete is cement mixed with an aggreate such as sand or gravel. It has more compressive strength. For example, sidewalks, driveways, streets, and buildings are commonly made with concrete, the mixture of cement and aggregate. They are never made with cement alone. The slurry made by mixing cement and water is excellent for filling little crevices in the hole and is just what we need to keep groundwater out of our well. For sealing the well, use cement. Mix cement and water until it is thouroughly mixed and has the consistency of a milkshake and pour it down the hole. Pour it in the annular space between the well screen pipe and the ground. Then leave it alone for a few days so it can cure.

Below is an excellent demonstration of how to insert the well screen and then remove the drillpipe. It is from Nomadic Medhunter on YouTube. He also describes the technique he used to compensate for the lack of water pressure. He started with a 3/4 inch drillpipe, then moved up to a 1.25 inch drillpipe and then finally drilled the well with a 2.00 inch drillpipe. Next, he inserted a 1.25 inch well screen into the 2.00 inch drillpipe and pulled the 2.00 inch drillpipe out of the ground, leaving only the 1.25 inch well screen.
Next: Real Well Drilling
 drillyourownwell.com